Brushing Teeth
 Objective
To teach children about oral hygiene and the importance of brushing teeth using interactive visual aids.
Estimated time to create the Learning Teaching Material for brushing teeth
1 to 1.5 hours
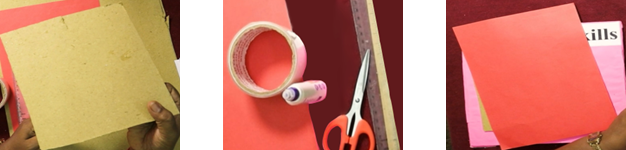
Materials required for creating the Learning Teaching Material for brushing teeth
- Cardboard sheets (for base and frame)
- Coloured paper or chart paper (pink, green, etc.)
- Printed images (before, during and after brushing teeth)
- Glue
- Scissors or cutter
- Ruler and pencil
- Bamboo stick (to hold the card)
- Black paint
- Labels or printed title (Self Help Skills)
Preparation for activity
Ensure all materials are kept ready before making the display frame and cards.
Procedure
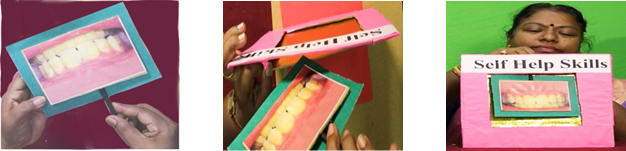
- Step 1: Prepare the outer frame. (Display slot)
- Take two sturdy pieces of cardboard and cut them into squares or rectangles.
- Cut a rectangular window or slot in the middle of one of the cardboard pieces, to create the display area.
- Cover it with coloured paper (see the pink portion in the images).
- Apply fevicol only on three edges of this slotted board and attach it to the other cardboard piece.
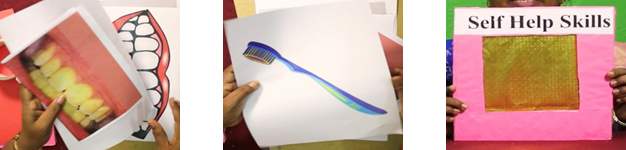
- Label the top of the frame with a printout of the title like, ‘Self Help Skills’ using bold font.
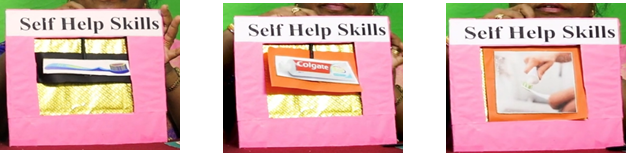
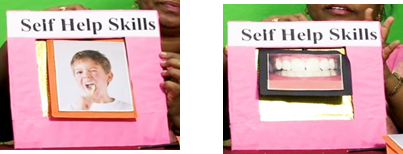
- Step 2: Create the image cards (before, during and after brushing)
- Print the images:
- Before brushing: Yellow or unclean teeth.
- For brushing the teeth: toothbrush, toothpaste, applying toothpaste and an image of a boy/girl brushing the teeth.
- After brushing: Clean and shiny teeth.
- Cover the images with a plastic sheet or laminate the images.
- Mount each image using fevicol, on a slightly larger, coloured cardstock (like green) to make it look like a border.
- Colour the bamboo stick with black paint. Attach the stick, to the bottom centre at the back of the card.
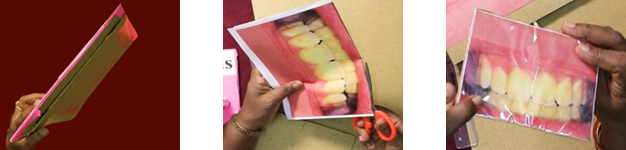
- Step 3: Insert the Cards into the Frame
- Slide the image card through the slot behind the display window.
- Ensure it moves smoothly up and down to display before, during and after brushing the teeth images interactively.
- Children can take turns pulling the card to know the process of brushing.
Step by Step Pictures to create the display board and cards

Important Tips
- Use high-quality, laminated images to make the LTM durable and cleanable.
- Make sure the sliding mechanism is easy enough for small children to use.
- Use large, bold visuals that are easily visible to the entire class.
Precautions
- Ensure there are no sharp edges on the cardboard or cutting area.
- Use non-toxic glue and materials that are safe for children.
- Supervise children while handling the slider mechanism to prevent tearing.
Troubleshooting:
Here are some common issues and solutions to ensure the display board works smoothly:
While Preparing the Display Board:
- The card doesn’t slide smoothly through the slot.
- Cardboard frame warps or bends.
- Use double-layered cardboard or mount it on a stronger base like foam board or thick corrugated sheet.
- Images don’t align with the window properly.
- Measure the window and image card precisely.
- Align the centre of the image with the display window before gluing the image to its backing.
- Handle (straw/stick) comes off.
- Use strong adhesive (like hot glue or fabric glue) and press firmly. Reinforce with tape if needed.
- Images look blurry or fade.
While Using the Display Board in Class:
- Students struggle to use it.
- Ensure the handle is long enough for little hands. Demonstrate its use before letting children try it.
- Frame tears due to frequent use.
- Reinforce the window borders with transparent tape or laminated edges to increase durability.
- Children confuse ‘before’ and ‘after’ images.
- Add small ‘before’ and ‘after’ tags on the images or use different coloured borders for each.
- Images detach from card base.
- Re-stick with strong glue or laminate the entire card, for better adhesion and durability.
- Always keep an extra set of printed images or an extra card ready —especially during presentations or activity days.
 Notes to the Teacher
- Introduce the Learning Teaching Material with a small discussion on personal hygiene.
- Begin by showing the ‘before’ image and ask the children what they observe.
- After discussion, slide to reveal the ‘after’ image to demonstrate the impact of brushing.
- Reinforce vocabulary: clean, dirty, germs, brushing, teeth, morning, night.
Using the Learning Teaching Material
- Introduce the concept of brushing.
- Show the ‘before’ picture first.
- Then use the cards in sequential order for brushing the teeth.
- Finally show the ‘after’ picture of clean and shiny teeth.
- Discuss the importance of brushing twice a day.
- Ask questions and encourage children to share their personal routines.
Video: How to use Learning Teaching Material
| Source and Attribution of images All images used in the above Assets and Aids are originally created. |
| This digital material has been developed by the Sri Sathya Sai Vidya Vahini Inclusive Education Project, a unit of Sri Sathya Sai Central Trust, Prasanthi Nilayam, as a collaborative offering in the service of our nation. |